Showing posts with label Tuscan kitchen. Show all posts

Tuesday, April 10, 2012

The details.... "Tuscan" kitchen makeover

Now that Spring break is over and all is quiet around here I thought I would share a few of the details of our kitchen makeover.  I have to be up front with you........ this "makeover" was a LONG process for us as we just weren't sure what we wanted to do.  And because I have agonized over whether or not I ought  to paint oak cabinets.... you know because of how it might affect resale value.  But well, this is OUR HOME.... and WE are living here so we NEEd to do what is best for us (or in this case best for me.... trust me, I'm the only one who spends much time in the kitchen and I LOVE spending time in there now!)

The artwork:

Virtually all the "art" in our kitchen has some sort of special meaning or purpose.... a picnic basket from a yard sale still fully functional, cake stands for entertaining, decorative plates from my childhood in Europe, a grinder like my mom & grandma used to make Grandma's cookies at Christmas, and then the LETTERs.  Yes my husband has a LOVE of typography (as do I) so I thought I would incorporate that love into our kitchen.

I just love our number 5.  It represents our family.  On the way it looks like it came from an old sign but in real life... cardboard, painters tape, and several layers of paint make up this lovely.  


The tin "I"... for our eldest.  In fact each member of our family is represented in our kitchen.  The old zinc/tin "I".... you guessed it. Cardboard again.  And not just any cardboard.... its from a pizza box.  How apropos for a teenager!!

The Hardware: 
All I can say is brass, brass, and more brass!  Ugh, I am NOT a brass person.... give me oil rubbed bronze, chrome, nickel, cast iron, even galvanized but please, please do not make me keep brass.  (and for the record we still have brass hinges but they make me cringe every time I think about it.... but they get the job done so... they will stay the same.. until I spray paint them!)   You can take a look here to see close ups of the new hardware.  The cabinet door handles, all the hinges, and the oven knobs all got a new coat of spray paint, Oil Rubbed Bronze.


Above the kitchen stove you will notice a trivet and a spoon hook.  The hook, well it is a souvenir.... it may or may not have came from the dining facility at our last base.  To this day we have no idea how we ended up with it, just that when we were unpacking after the move we found it.  So as a reminder of all the lovely times we had we made it into a hook.  Yes it was a group effort between the bending (which was no easy feat!) and the pounding to flatten it (that was a LOT of fun!!)

(sorry about the poor quality.... its in an odd space that just does not get good light... and trust me this is not an accurate representation of our red walls... its photographing too pink.)

I guess I really ought to get myself in gear... the next project awaits me.  Art for the dining room (final project) and then its off to work in the spare room or go do a little grocery shopping.  And maybe make up a loaf or two of French bread and some chocolate chip cookies to warm up the house a bit.  

Have a wonderful day!

Saturday, April 07, 2012

"Tuscan" kitchen REVEAL!


The "AFTER".... and by the way I just thought I ought to warn you that this is going to be pretty photo heavy.  

Homemade art and childhood memories


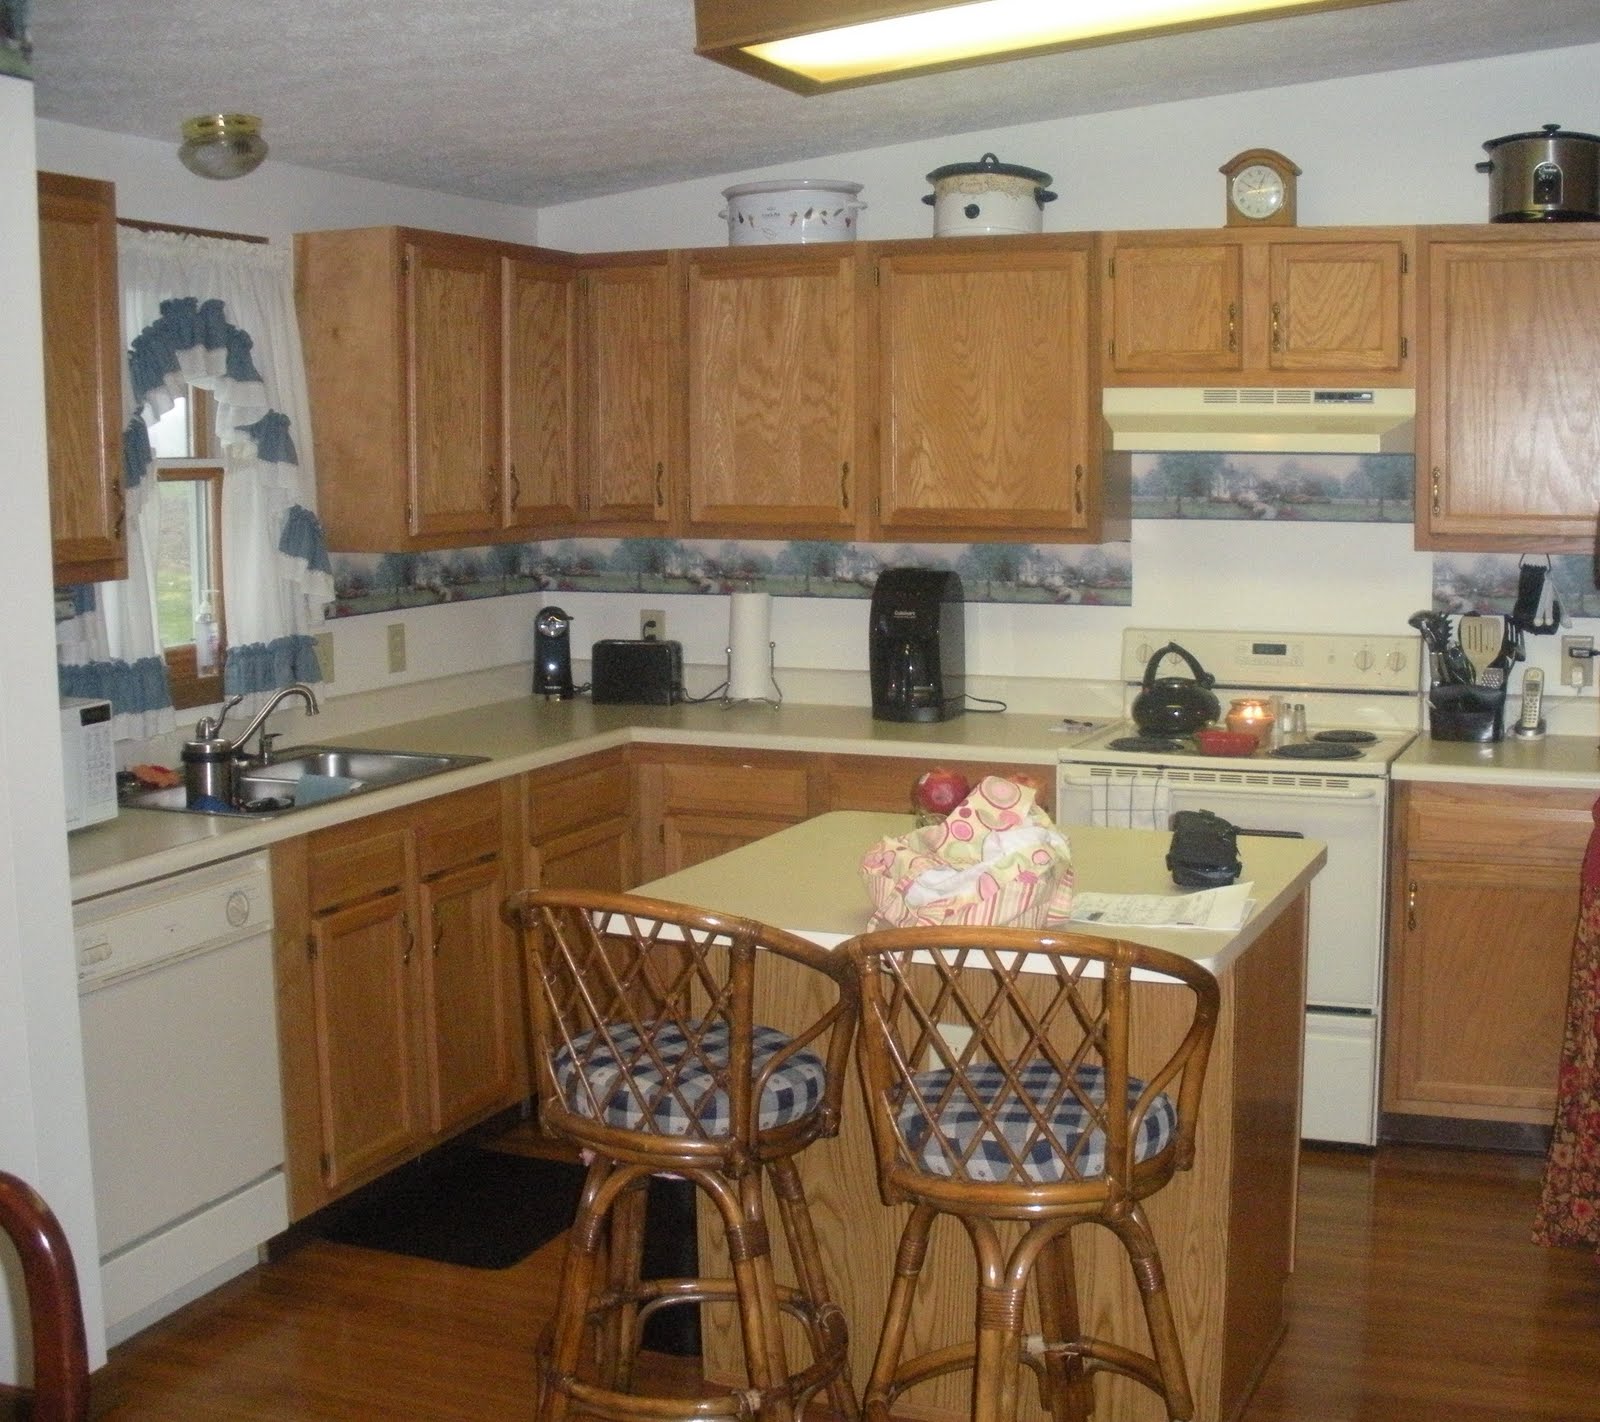
And now a quick look of what it looked like when we first looked at the house.


just pictures for now as we are off for the next day or two....

Have a very Blessed EAster!!

(see you monday)

Feel free to take a look here for the details...

Linking up here:
The Shabby Nest Photobucket  Funky Junk's Saturday Nite Special  homework shabby creek cottage

Tuesday, April 03, 2012

Paint, paint, and more paint!

The kitchen is coming along quite nicely and yes with any project there seem to be delays.  Which in our case is a good thing!  And I mean super, duper, incredibly awesome thing!!  You see when we started this "project" we were seriously considering getting a new oven, new countertops, and a new exhaust fan but the issue was we didn't really NEED these items.  Okay the exhaust fan might be the exception as our current exhaust fan is a recirculating fan and let me tell you it does a FINE job of recirculating odors and smoke (from cornmeal when we have pizza) throughout the WHOLE house... yeah NOT exactly the job I would like it to do!!  Let's just say the boys like to make comments like "oh we knew the pizza was done because the smoke detector just went off..."  Ha ha ha!  Funny guys!  And no it isn't because the pizza is burnt but rather the cornmeal which inevitably ends up on the floor of the oven... yeah not a pretty sight! :)

Oh my I digress!  Sorry... we were talking about the good things caused by the delay.  You see last week I was painting furiously away when I took a step which resulted in pulled ligaments in my foot.... How did that happen?  Uh, I have NO earthly idea!  I mean seriously, NOT a clue!  One minute I'm painting, the next minute I can't put my foot flat on the floor without wanting to cry.  But I could tiptoe, which by the way is a GREAT calf workout!!  So much of the weekend was spent with my foot up.... looking over OLD magazines and notes.  I mean, seriously OLD!  Okay not that old but according to the guys they were practically ancient.... (Martha Stewart Living from the early 90's)  It was when it hit me that I've been enamored with white cottage style kitchens for over 20 years.  All the clippings of my "dream" kitchens had white beadboard cabinets, wrought iron hinges, wood bowls, white serving pieces, bits of aqua & red "accents", and butcher block tables.  So we took the old hinges and gussied them up.  The stove works fine but well it looks ugly... SO.... we are painting it!  Yep high heat spray paint or appliance paint (I have to check the specs again because I can't remember it the appliance paint will work.)  I've used them before and they worked like a charm.  So now the exhaust fan and stove will be black.

Here's a sneak peek of how things have progressed.....

As I write the bottom door and drawer fronts have had their final coat of paint and are awaiting installation.  Next to come..... "updated" stove and exhaust fan.  Final two projects countertop conversion and island makeover.

Materials purchased to date:
ORB spray paint:  hinges and handles
Zinzer primer
Valspar Kitchen and Bath Enamel
3 cupped drawer pulls
5 drawer handles
3 under-the-counter stemmed ware glass holders

HOpe you are having a wonderful week and having gorgeous weather!  The boys are out of school this week for spring break so they have been great about helping out where needed in addition to just goofing around!

Toodles!

Friday, March 30, 2012

I just couldn't stand the suspense.... (kitchen progress)

so I have to share a picture!  I'll be the first to admit I've always been terrible when it comes to suspense or surprises.  I mean I can keep something quiet if need be (case in point... my husband still does not know exactly what I did while in the USAF because I couldn't tell him) but I'll be the first to admit I do NOT mind knowing the end of a book or even a movie.  So not showing pictures of the kitchen just wasn't an option for me.

The base cabinets and drawers are drying before they get primed. And the cabinets on the right?  Well I took down the paper to see which look I prefer.  Any thoughts? And what about a black stove?  (It would be the same stove just painted black with the high heat spray paint we already have.)

And do you know what I found tucked far back in the corner of the "pantry" cabinets (uppers on right side)?
Pasta!  Cute organic "elk" pasta!!  (Yes in these here parts we call those "elks" MOOSE!)  Aren't they adorable?!  Two of my children thought they were "cool" but the third wasn't available for comment.  I can hardly wait to mail one packet off to friends of ours in Alaska... that way they can have moose pasta with their moose meat!

And these little lovelies... well I had a few pennies left from my birthday money and stumbled across them on etsy.  I just love mushrooms!  Especially cute little retro salt and pepper shakers!

Have a wonderful weekend!!

Friday, February 03, 2012

Oil rubbed bronze hardware-a makeover

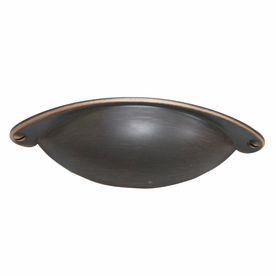
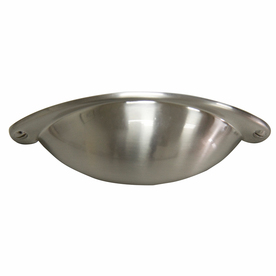
The sweet "Tuscan" kitchen has new hardware!!!  Yes you read correctly Oil rubbed bronze!!  I know, I know that is so last year but you know what I love it.  When we first moved in I was not crazy about the cabinet handles so we changed them out... brass to nickel/chrome.  Now don't get me wrong because I still ADORE chrome... always have, always will.  Something about that shiny, silvery finish just leaves me all a twitter but hey a girl can broaden her horizons.  Enter cast iron, wrought iron, and oil rubbed bronze.  I don't something about them just scream old world and as we all know that is me... a touch of the "old world", a bit of "modern" and just a smidgeon of country, hmm make that "old world country."  So this week on a whim I decided to drop into Hobby Lobby on a day when I had a splitting headache and could hardly see straight (yes it was mainly because I was in desperate need of a soda but hey it is just across the street so why not stop in, right?)  Then what to my wandering eyes should appear... a sign for 50% off all drawer pulls and knobs.  Were my eyes deceiving me?  Were those really "wrought iron" cup drawer pulls?


So a few minutes later I walked out of the store with these beauties.


And these!

A few days later the chrome was transformed to this!

Friday, January 27, 2012

"Tuscan" kitchen progress

As you all know I decided to take Donna up on her Picture Perfect Room Challenge.  The kitchen is coming on smashingly!  Have you ever noticed when you start a project it has a tendency to lead to more projects???  That is exactly what happened in the kitchen.  I got the bead board wallpaper on the cabinets only to discover the drawers now look lacking.
So do you think the drawers need pulls? or should they be left as it?

I am thinking something along the lines of these... from Restoration Hardware


or either one of these from Lowe's

or 


a close-up of the bead board wall paper

Yes it still needs to be painted but that will have to wait until it is warm enough to leave the windows open.


I still have a few things to hang such as these.....

They have all been in both our families for as long as we can remember and I always try to hang them in the kitchen or dining room.


Hmm, do you think someone wants some jello?! ha ha!


Funky Junk's Sat Nite Special

Friday, January 13, 2012

Chalkboard wall

As many of you know I bit the bullet and made a commitment to get all the rooms in our house finished prior to graduation this spring.  For a while I was so overwhelmed with the size of our new home, then it was the construction of the addition, and finally the camel that broke the straws back straw that broke the camel's back was years of emotional baggage.  Let's just leave it at I have a godly husband who is such a blessing.  Which brings me back to the kitchen and decorating... after some late night discussions I realized that I've been far too concerned about trying to do things the way I thought other's thought I ought to be doing things... Are you still with me?  Good because I'm not to sure I'm with me.. ha ha! :)  That being said inspiration has struck or rather God opened my eyes to the potential.  And do you know what I discovered??? My husband really likes my ideas!!!!  plus he has some great ones of his own!!!

Wow, where was I going with this??? Oh yeah the chalkboard wall... years and years ago we had lunch at the cutest little restaurant in Estes Park... in the middle of winter... and we were the only customers.  Just Chris and me.  And all of their tables had chalkboard tops and they had a chalkboard wall.  Well I've wanted one EVERY since... (by the way, the meal was delicious, the waiter hilarious, and the company incredible! now if only we could remember the name of the cafe!!)

So without any further adieu.... the new chalkboard wall!

The details:
chalkboard paint: Lowe's several years ago for another project

*edited 7/27/2012: this is probably one of my most economical projects to date as the quart can of chalkboard paint has now been used to paint TWO chalkboard walls as well as DOZENS of vinyl labels for containers plus a minimum of 36 tags for baskets & gift cards.

basket: first one I ever wove
bag: fabric leftover from a project... turned inside out
garlic: from this past summer's CSA
clock: brought back many moons ago from Chris' deployment to Riyadh
plant, bucket and rod: Ikea last year w/ a gift card

So as you can see we are using, reusing, and repurposing what we already have.  It is so much fun seeing a room come together and knowing that my family loves it as well!  

Hope you have a great weekend!  Stop back by to see how things are progressing... :)  

'til later!

I'm linking to:


    homework  Photobucket   shabby creek cottage
    The Shabby Nest   I'm Lovin' It at TidyMom a beach cottage  Photobucket

Monday, January 09, 2012

A "Picture Perfect Room" challenge... Room 1: before

Am I the only one who can hardly believe it is almost the middle of January already?  How did that happen?  And where did the weekend go?  Oh yes, I spent it reading!  It was a reserve weekend which I jokingly refer to as Wednesday.  You see my husband is an active duty reservist.  I know, who knew there was such a thing, right?  Well he has been on active duty in the reserves for the past 7 years.  What does this have to do with his reserve weekend being a Wednesday?  Well, you see when he has a reserve weekend he works a 12 day "week".  And when Monday rolls around we know there are only 4 more days before he has a normal 2 day weekend.  So Sat/Sun/Mon is our "Wednesday" aka middle of the "week".  And typically not a lot gets done over the reserve weekend!  Henceforth my weekend of reading. and laundry but that's a given.

Donna over at Funky Junk Interiors is going to be doing a "Picture Perfect Room" challenge.  And knowing that I really want to have ALL the rooms in our house completed prior to graduation I decided now is the time to start.  The first room up.... our KITCHEN! which will lead into the DINING ROOM then the LIVING ROOM and FAMILY ROOM.  As you all have seen we have a fairly open floor plan so each of these rooms can be seen from pretty much each room.  Okay the kitchen can't be seen from the living room but it always spills over into the dining room which CAN be seen from the living room.
Today was supposed to be the first day.... a very productive day!  A day for scrubbing, cleaning, applying wallpaper to the kitchen cabinet door inserts, rearranging cabinets, sorting jars, etc.  Lets just say its not happening quite like that...  Do you see this lovely digit?  
What you can't see is the swelling.  Lets just leave it at it was one of those truly weird freakish accidents and the crazy thing is I was by myself when it happened, no one else to blame.  ha ha! Thankfully my whole hand wasn't injured, it doesn't appear to be broken, and I am starting to gain a bit of movement back.  Who knows maybe I will be able to tackle some of the kitchen work after all.  So today I am at least making my list of projects and am starting to do a bit of the organizing.  

I will leave you with a "before" picture and the plans for what all I am we are doing.  


No cost changes:
-Add bead board wallpaper (bought on clearance plus military discount using a giftcard at Lowe's a year ago) to door inserts
-possibly paint "island"
-clear off countertops
-organize jars and contents.  switch more items into jars.  possibly spray paint all lids to match.
-label everything using label maker, Silhouette, and label paper punch
-paint entire wall next to refrigerator with chalkboard paint.
-reuse chalkboard contact paper on refrigerator and to make tags
The BIG splurge:
-changing out non venting stove hood for a vented stove hood.  ideally either one of these from Ikea
Currently we have a non-venting fan over our stove.  Yeah not the greatest idea or invention known to mankind.

Currently done:
-changed pendant light out over sink for one we fell in love with at Lowe's which was on clearance last January for $5.  I LOVE it!!!  It fits right in with my love for Scandinavian design/decor (which I have absolutely none of until now.)

Do you see my pine cone trees I made?  On top of the kitchen cabinets?  I absolutely love them and plan on making a few move over the year.  The idea is to have groupings of 3 above the cabinets over the holidays.  

I hope you are having a good start to a great week!  Now I am off to get a little work done (or do a little more reading...)  Toodles!


Thursday, October 07, 2010

The dining room...

Yep, it is done!!  Chris insisted upon new chairs for the table plus we finally put up the pictures and decorations!  I think he would like a new fan/light in the dining room plus undercabinet lighting in the kitchen but that will wait.  We both have Lowe's and Home Depot gift cards but are going to wait until after Christmas (its our standard present) before we tackle any more projects.  Oh the one missing element in the dining room is the shades for the long windows (I don't remember where I put them for "safe" keeping...)


before


midway


And done!